If you're like me, you might enjoy using the Linux shell, especially if you need to use commands like gcc compiler for C, getting manual pages for developers, and so on. This article tries to create a virtual environment by utilizing Virtual Machines (VMs), specifically VirtualBox (VM provider), and vagrant as the tool that sits on top of VirtualBox. We use these two because they are both free and lightweight.
Why Would You Need to Create a Virtual Environment and Not Work on Your Local Machine?
Here's why - Installing a large number of dependencies, games, tools, and other applications in one environment can lead to conflicts later on.
This is where virtual environments come in handy! They will assist you in maintaining a stable environment by separating tools, for example when installing different versions of Nodejs on the same environment, which may cause npm conflicts, and so on.
It provides a great deal of stability and security by dividing a single operating system into multiple virtual machines, each running separate pieces of software, while also making it easy to install older versions of libraries as needed.
You've probably heard developers say, "But it works on my machine..."

This is the problem that virtual machines attempt to solve. But an individual developer may have a different operating system, library version, database drivers, and even software versions installed. If developers agreed to work on a project using a similar toolset with the same software and dependencies installed, they would be guaranteed to change to "It works on all machines😃😃😃"
So, What is Vagrant?
This is an open-source tool that assists in the management of virtual environments provided by a VM provider such as VirtualBox or VMWare. It allows you to simultaneously set up and manage virtual machines in a variety of environments.
How To Install Vagrant on Your Local Machine
Whether using MacOs or Windows
- Download VirtualBox
- Install VirtualBox
- Download Vagrant
- Install Vagrant
- Open terminal/cmd application
- Add the OS image you want, here we use Ubuntu Focal
vagrant box add ubuntu/focal64 - Create your VM
vagrant init ubuntu/focal64 - Start your virtual machine
vagrant up Get inside your virtualMachine
vagrant sshUbuntu
- Open the terminal
- install VirtualBox
$ sudo apt-get install virtualbox - install Vagrant
$ sudo apt-get install vagrant - Add the OS image you want, here we use Ubuntu Focal
vagrant box add ubuntu/focal64 - Create your VM
vagrant init ubuntu/focal64 - Start your virtual machine
vagrant up - Get inside your virtualMachine
vagrant ssh
How Do We Get To Use This Environment with VS Code?
You will need the Remote-SSH extension that helps you interact with projects you are working on and take advantage of the features that come with VS Code.
Get Started...
- Install the Remote-SSH Extension
Note: A green icon appears on the bottom left
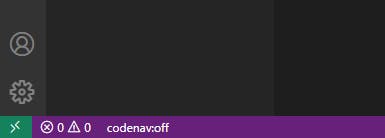
If you had closed your cmd or terminal, then:
- In your terminal run
vagrant up

- Then run
vagrant ssh-config > output.txt, this file will generated be and saved in your working directory. We will use it later. But if you close VS code again, you will just be usingvagrant sshto get inside your Virtual Machine. Let us see the file contents withcat output.txt
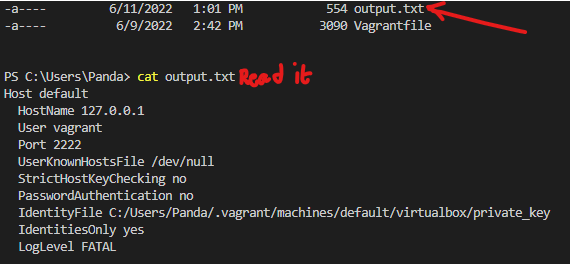
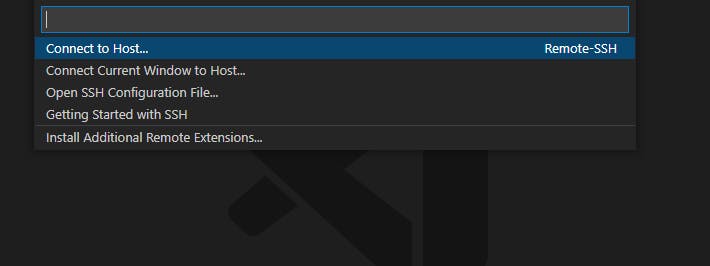
Select the Green Icon from Step 1
Select Open configuration file
- Copy the details of the generated file into the Open Configuration file and change the
Host to Vagrantthen save it. (You can now delete output.txt)
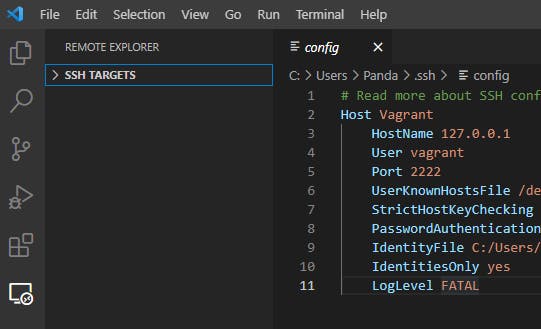
Select your connection on The Remote Explorer icon that appears on the Left Activity bar you will see SSH TARGETS.
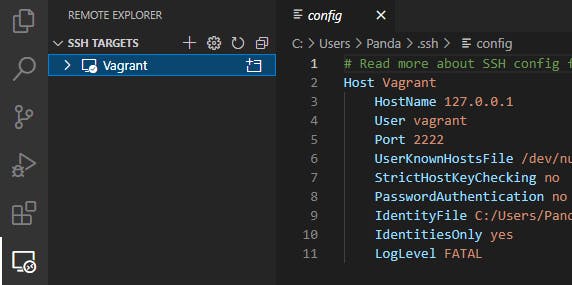
Choose your SSH TARGET, here we are using Vagrant. Now look for a project you want to work on or Clone a Repository.
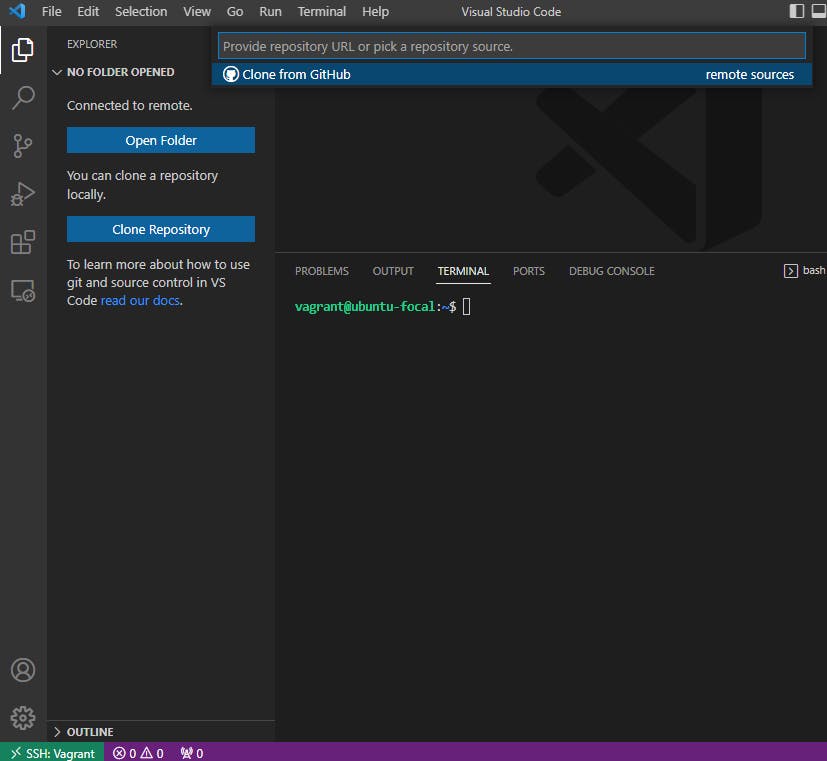
- Use vagrant on vscode
Now, let’s clone a project and add a file with
touch vagrant.txt to be sure everything is working out fine. A pop-up shows asking where you would like to save the file. Choose an existing folder or just click ok to have the project cloned in the vagrant home directory *home/vagrant/*

There you go! It Works!
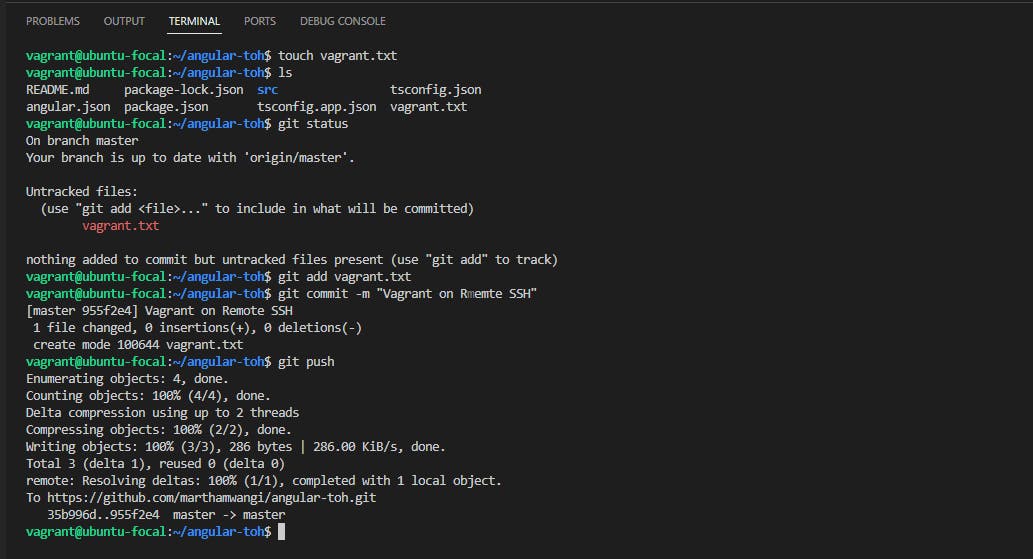
As you can see, we added the file successfully, added it to our branch, committed it, and pushed it to a remote repository. Feel free to experiment with various shell commands, install dependencies for your projects, interact with various features provided by VS Code, or collaborate on a project by installing a similar toolset with other developers.
HappyCoding😎😎!!